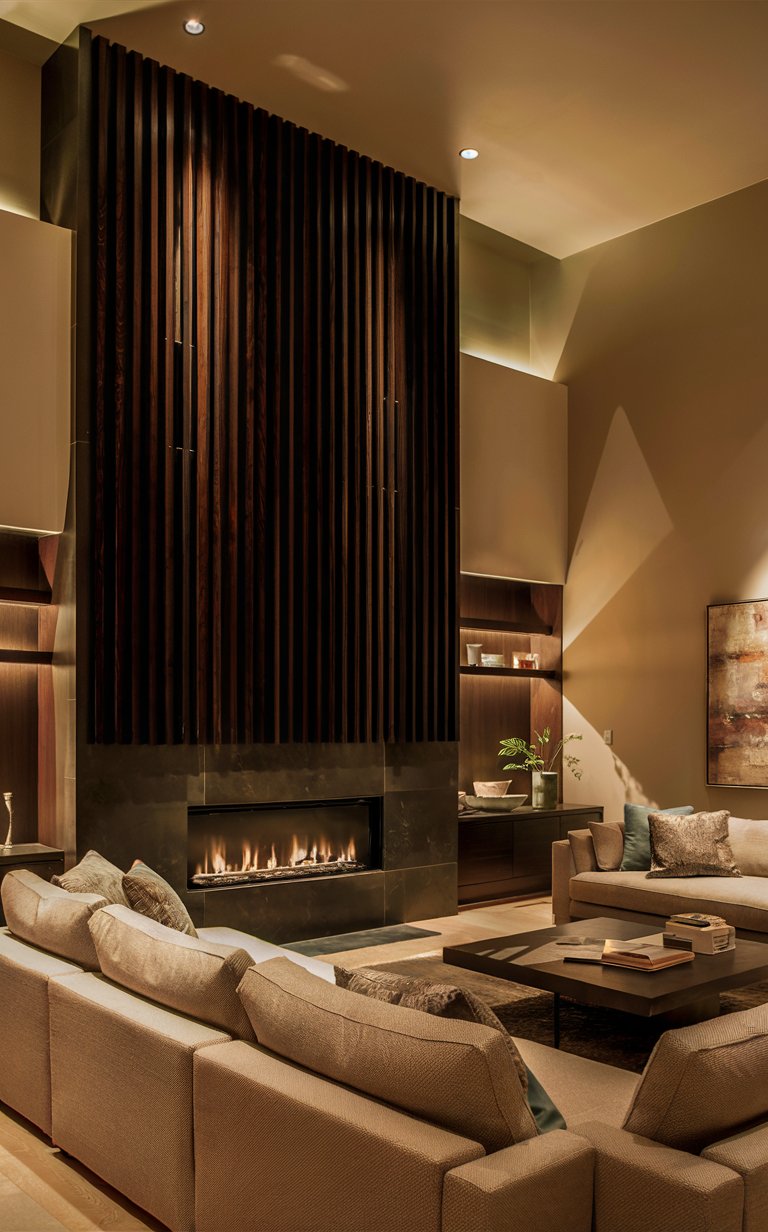
Why Choose a Wood Slat Accent Wall?
Wood slat walls offer a versatile design solution that complements various interior styles, from modern minimalist to rustic farmhouse. The vertical lines created by the slats can make a room appear taller, while the natural wood tones add warmth and character.
Whether you're looking to enhance a living room, bedroom, or entryway, a wood slat accent wall is a stylish and impactful choice.
Materials and Tools Needed
Before you begin, gather the following materials and tools:
- Wood slats (cedar, pine, or oak are popular choices): https://amzn.to/4bYodiY
- Measuring tape
- Level
- Pencil
- Saw (miter saw: https://amzn.to/4ckoZXf or hand saw: https://amzn.to/45t0qW2)
- Sandpaper
- Wood glue or construction adhesive
- Nails or brad nails
- Nail gun (optional): https://amzn.to/4b3sn83
- Paint or stain (if desired): https://amzn.to/4elWlXN
- Painter's tape: https://amzn.to/4erUvVs
- Drop cloth
Step-by-Step Guide
1. Plan Your Design
Start by planning the layout and design of your wood slat accent wall. Measure the wall area to determine the number of wood slats you’ll need. Decide on the spacing between each slat; a common gap is between 1/2 inch to 1 inch. Sketch your design on paper to visualize the final look.
2. Prepare the Wall
Clear the wall area and cover the floor with a drop cloth to protect it from any mess. If your wall has any existing paint or wallpaper, ensure it's clean and smooth. Use painter’s tape to outline the area where the wood slats will be installed.
3. Cut the Wood Slats
Measure and cut the wood slats to fit the height of your wall. Use a miter saw for precise cuts, and sand the edges of each slat to smooth any rough spots. If you prefer a stained or painted finish, this is the time to apply it to the slats and let them dry completely.
4. Install the First Slat
Starting at one end of the wall, use a level to ensure the first slat is perfectly vertical. Apply wood glue or construction adhesive to the back of the slat and press it firmly against the wall. Secure it with nails or a nail gun for extra stability.
5. Continue the Installation
Continue installing the slats, using spacers to maintain even gaps between each one. Check periodically with the level to ensure the slats remain straight. If you encounter any outlets or switches, measure and cut the slats accordingly to fit around them.
6. Finish the Edges
Once all the slats are installed, check for any gaps or uneven edges. Sand any rough spots and touch up with paint or stain as needed. If desired, you can install trim around the edges of the accent wall to give it a polished, finished look.
7. Admire Your Work
Step back and admire your new wood slat accent wall. The vertical lines and natural texture will add a striking focal point to your room, creating a visually appealing space.
Tips for a Professional Finish
- Consistency is Key: Ensure all slats are evenly spaced and aligned for a uniform look.
- Quality Materials: Use high-quality wood and adhesive to ensure durability and longevity.
- Accent Lighting: Consider adding lighting above or below the accent wall to highlight the texture and create a cozy ambiance.
A DIY wood slat accent wall is a fantastic way to elevate your home's interior design. With careful planning and attention to detail, you can create a stunning feature that reflects your personal style and craftsmanship.
Whether you choose to stain the wood for a rustic look or paint it for a modern touch, the result will be a beautiful, custom addition to your home.


Comments
Post a Comment