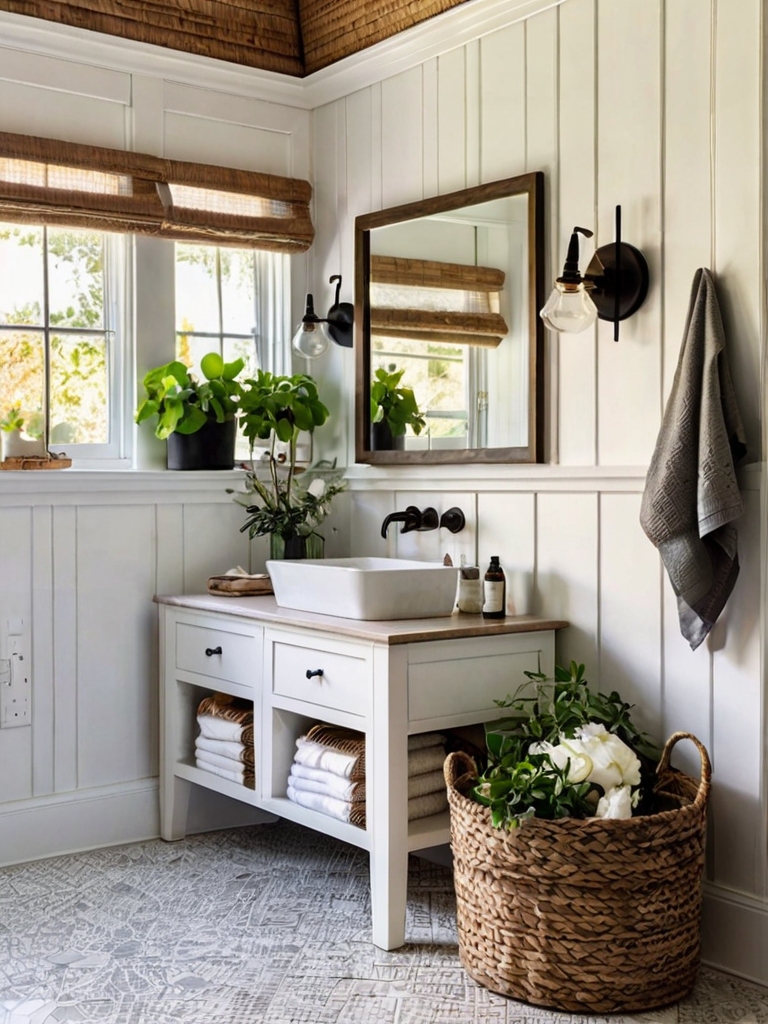
Calling all DIY enthusiasts and farmhouse fanatics! Shiplap walls have become synonymous with cozy charm, and creating your own accent wall is a project brimming with creative potential. But before you grab your hammer and dive in, let's navigate the exciting world of DIY shiplap with these 25 valuable tips and tricks!
Planning Makes Perfect: Setting the Stage for Your Shiplap Masterpiece
- Measure Twice, Cut Once: This age-old adage applies here too! Measure your wall meticulously and determine the number of shiplap planks you'll need. Factor in any cuts or design features.
- Material Marvels: Choose your shiplap wisely! Solid wood offers a timeless look, while MDF is a budget-friendly option. Consider pre-primed planks for a head start.
- Spacing it Out: The spacing between your shiplap planks can drastically impact the overall look. Experiment with different spacings on a test board before committing.
- Horizontal Hold: Horizontal planks are perfect for creating a wider look, especially in smaller spaces. Vertical installation adds height and drama.
- Embrace the Shiplap Gap: A subtle gap between planks is a classic farmhouse detail. Use spacers during installation to achieve this look.
Beyond the Basics: Unique Shiplap Design Ideas to Spark Inspiration
-
Welcome the Wainscoting Wonder: Combine shiplap with wainscoting panels at the bottom for a layered and sophisticated look.
-
Play with Paint: While white is a classic, explore colors! Soft greys, blues, or even a light green can add a unique touch.
-
Embrace the Power of Pattern: For a bolder statement, consider using shiplap with a pre-painted pattern or staining it for a rustic touch.
-
Mix and Match Magic: Don't be afraid to combine different shiplap widths or textures for a visually interesting accent wall.
-
Mirror, Mirror on the Wall: Strategically placed mirrors can reflect light and make your space feel larger, especially with a shiplap accent wall.
Pro Tip: Planning to paint your shiplap? Consider painting the planks before installation for a cleaner finish, especially if you're using a dark color.
Installation Inspiration: Mastering the Art of DIY Shiplap
-
Wall Prep is Key: Ensure your wall is clean, smooth, and free of imperfections for a flawless shiplap installation.
-
Befriend the Stud Finder: Locate wall studs before drilling to ensure secure attachment of your shiplap planks.
-
Level Up Your Game: A level is your best friend! Use it regularly to ensure your shiplap planks are perfectly straight.
-
Nail Gun Nirvana: A nail gun can significantly speed up the installation process. If not available, a hammer and finishing nails work well too.
-
Caulk it Up: Apply caulk along the shiplap seams and nail holes after installation for a professional finish.
Insider Tip: Use painter's tape around the edges of your wall before installation to protect your existing paintwork from accidental nicks or spills.
The Finishing Touches: Adding Personality to Your Shiplap Masterpiece
-
Light it Up: Highlight your stunning shiplap wall with strategically placed sconces or recessed lighting.
-
Shelf it Good: Floating shelves add visual interest and functionality to your shiplap accent wall.
-
Gallery Glamour: Create a curated picture gallery on your shiplap wall for a personal touch.
-
Woven Wonders: Woven baskets hung on your shiplap wall add a touch of texture and farmhouse charm.
-
Greenery Galore: Spruce up your shiplap wall with hanging planters or vases filled with greenery.
Unique Value Tip: Don't forget about your baseboards! Replace your existing baseboards with thicker ones to complement the added dimension of your shiplap accent wall.
Embrace the DIY Journey: Unleashing Your Inner Shiplap Superhero!
-
Don't Be Afraid to Experiment: Shiplap is a versatile material – have fun and experiment with different design ideas!
-
Start Small, Dream Big: If you're a DIY novice, begin with a smaller wall before tackling a larger space.
-
Safety First: Always wear safety glasses and gloves when using power tools.
-
Seek Inspiration Online: Pinterest and design blogs are treasure troves for shiplap inspiration.
-
Celebrate Your Creation: Once complete, step back and admire your stunning DIY shiplap
Shiplap Sensations: DIY Accent Wall Must-Haves
Note: These are affiliate links and I may earn a commission if you click on them and make a purchase. However, I have chosen these products based on their relevance to the blog post and not for the purpose of making money.
Bonus Tip: Feeling extra crafty? Consider creating your own custom shiplap planks from plywood or MDF.
Shiplap for Every Room: Expanding Your Design Horizons
While shiplap is a natural fit for living rooms and bedrooms, don't be afraid to explore its potential in other areas:
-
Bathroom Bliss: A shiplap accent wall adds instant charm and texture to a bathroom, especially when paired with vintage fixtures and rustic décor.
-
Kitchen Magic: A shiplap backsplash adds a touch of farmhouse flair to your kitchen. Consider installing it behind your sink or stove for a statement piece.
-
Entryway Elegance: Create a welcoming first impression with a shiplap accent wall in your entryway. Pair it with a vintage mirror and a rustic console table.
With these 25 tips and tricks as your guide, you're well on your way to creating a stunning DIY shiplap accent wall that injects farmhouse charm and personality into any room. Remember, the most important ingredient is your creativity! So, grab your tools, unleash your inner designer, and get ready to transform your space with the magic of shiplap!


Comments
Post a Comment